Handwriting
Handwriting is a very complex perceptual-motor skill which takes up a large proportion of the child’s school day. In order to be able to write, a child needs to have appropriate core skills: good postural stability to sit/stand to make marks on the page and fine motor skills to manipulate a pen/pencil.
We have listed a range of common difficulties that children have with handwriting, including strategies that can support to develop the skills needed to improve overall handwriting skills. Children should be given time to master each skill required and time to consolidate their learning.
It is important for all children to sit properly when writing. Being seated properly gives a child good stable posture from which they can develop their handwriting. The children who have difficulty with their movement can find it very difficult to sit comfortably or with stability. It is even more important for these children to get their posture right to help them develop handwriting.
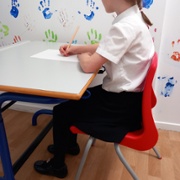
- The chair should allow the child to sit comfortably, with feet flat on the floor and bottom well back on the seat.
- If the chair is too high (and no smaller one is available), and the child’s feet are not touching the floor, then a phone book, wooden step or footstool should be used to support the feet.
- If the chair is too low, cushions or pieces of foam can be used to raise the child.
- Slanted desk tops or writing slopes can help to correct a poor writing position by encouraging the child to sit more upright. Try using a lever arch file to alter the angle of the paper.
Some children will naturally hold the pencil in a tripod grip as they develop their hand skills, while other may need this to be taught. There are lots of different ways that children can be taught how to hold their pencil in a tripod grip and these should be explored to determined which works best for the child.
The child should be encouraged to check and adjust their grip before writing. Pencil pick ups/ rainbow writing/colouring can be a good way of learning pencil grip as it involves repetition.
An inefficient grasp can be the cause of discomfort when writing. If the child is holding a pencil too tightly this can be a sign of instability of the fingers or hand and cause slower writing, increase fatigue and frequent need to stop. In this instance a soft cushioned pencil grip can help to adjust the level of pressure being put through the pencil and can help to decrease the strain on the finger joints
There are a range of pencil grips available commercially which can be used to help the child achieve a tripod grip, these should be considered if the child has been unable to achieve a function grip having completed the activities above.
Top tips
- Keep pencils short to prevent alternative grips
- Place tape or an elastic where you want the pencil to be held for children that hold higher up
- If the child keeps the pencil vertical when writing rather than resting in webspace, try placing some bluetac onto the end of the pencil to give it some weight, you can also try writing/ drawing on a vertical surface.
Ideas to encourage pencil grip;

|

|

|
| Use a short pencil/crayon to encourage the child to use only their thumb, pointer and middle finger |
Put an elastic band or stickers around the pencil/crayon to reinforce finger positioning (approx 2cm from the lead) |
Use chunky triangular pencil/crayons to encourage a tripod grasp |
Placing the paper correctly will facilitate a functional position of the arm, wrist and fingers will help to reduce fatigue and tension. There are alternative strategies for left handed writers.
- The paper should follow the direction of the arm with a slight slant, an angle of 35-40° is usually the most efficient but experiment with what feels the most comfortable for the child
- The use of the supporting hand to stabilise the paper is very important and often something that is overlooked
- If paper positing is a particular area of concern, try taping the page to the table
With practice and guidance, the child who uses their left hand can develop their handwriting skills just as well as those that use their right. Helping the left handed child develop an awareness of the important factors to consider prior to and when writing will make handwriting both easier and more comfortable.
The most important factors are:
Position of the writing paper
Position of the arm and wrist
The grip on the pen/pencil
Word spacing
Posture
Having a good posture is a crucial starting point so make sure that the child is sitting properly - desk and chair at a comfortable height, feet flat on the floor, bottom at the back of the chair, chair near the table, shoulders relaxed.
Optional: the table could slope slightly towards the child and the seat slope slightly towards the writing surface. Or try a writing slope or posture pack.
Things to try to correct this:
o Use a footstool
o Cushion on top of the chair
Left handers may need more space and can prefer to sit on the left side of a shared desk
If in groups or on a double desk, sit the left handed writer on the left side so as not to bump elbows with their partners. If possible, allow them to sit on the left side of
the class when facing the front
To avoid shadows, aim for a light source which comes over the right hand shoulder. Move seating to the left side of a room if light source is from a central light.
Positioning
Make sure that the child has plenty of room, particularly if they are working with right hand partners.
If in groups or on a double desk, sit the left handed writer on the left side so as not to bump elbows with their partners. If possible, allow them to sit on the left side of the room when facing the front
Place the paper slightly to the left side of the body to give the best view of the line, let the child experiment to find the most comfortable angle.
Slant the page to the right so as that the top left hand corner is slightly higher. When initially introducing this strategy you could draw a small arrow in the right hand bottom corner, which is pointing towards the top left hand corner to help. Encourage the child to position the arrow so as that it points directly away from them.
This position will help the child’s arm to move more freely across the page as they write and hopefully avoid too much smudging.
Stabilise the paper with the right hand in the middle or towards the right edge of the paper away from the line to be written on
Use a writing mat to reinforce paper positioning if required
The left forearm should remain parallel with the sides of the paper to avoid the development of a
hooked hand
Have the child help to make a ‘frame’ from taping on the desk around the shape of paper which can provide a cue for positioning.
Use child’s forearms as a guide for paper positioning by placing arms on table with hands together forming an upside down ‘V’, then put paper in towards the L, slanting towards the R.
Having additional sheets to copy from are helpful when the child needs to be able to read text
Writing Implements and Grip
Unlike right handers who pull their pen across a page making it easier to make strokes from left to write Left handed writers have to push their pens across the paper, in doing so the left hander has a tendency to dig the pencil into the paper as they work across the page which impacts of their presentation and consistency. Finding a pen or pencil specifically design for left handers can help this issue
Ideally left-handers should hold the pen or pencil 2-3cm from the point to enable them to see round their fingers and avoid hooking with the writing hand, a small elastic band wrapped
round the pen/pencil can help to reinforce this
If there is a tendency to grip the pencil too tightly encourage them to hold the pen/pencil further up the barrel or try different types of left hand specific pens/pencils
If pressing too hard is the problem, try placing cardboard or carbon paper under the paper they are
writing on to provide feedback
If writing is being obscured, try:
o Moving the grip further back from the tip of the pencil,
o Moving elbow further away from the body,
o Positioning the paper nearer or further away,
o Leaning the trunk forward.
Tips for letter formation
Whilst the left hand writer forms the majority of letters the same as a right hander. There are a few that can be formed differently to make it easier. Allow them to do what it natural or if they are struggling teach them these differences
These include
T – J- I = line down –top line starts at far side and flow left
E-F= Start at far left flow left and down and work the bottom line –finish with middle line
Alphabet knowledge
In order to be able to write and put letters together to make meaningful words a child needs to have an understanding of what the letters of the alphabet are. If they struggle with this try an alphabet strip on their desk to reinforce the letters, this can also help to prevent reversals. If the child does not yet know the alphabet, then this will need to be taught first.
- For letter recognition, have child read through a story at his/her reading level and circle all of the a's or b's, etc
Letter Formation
Learning to form letters is important for fluency and speed of written work but can be extremely difficult for some children to master.
- It is important that children learn to form letters in one fluid stroke rather than forming letters in fragments. Discourage the child from lifting their pencil from the page.
- A multi-sensory approach to learning is a great approach for all children. Practicing writing letters in the sand, with paint etc can providing additional learning opportunities in a fun way.
- Go slowly do not rush the child; handwriting can quickly become a source of anxiety and frustration to children. Practice a little and often to maximise results, for example, 10-15 minutes sessions 5 days a week with as many multi-sensory activities as possible.
- Developing bad habits are difficult to break, especially in older children correct any difficulties early.
- Free hand letter formation has been found to be more useful than tracing as it relies more on motor memory rather than vision
- As new letter groups are learned continue to consolidate those already learnt to reinforce them.
- Practice forming the letters with closed eyes to reinforce the motor memory of that letter
- It can be helpful to group letters with similar motor movements:
- The C family – c a o d g q
- Letters starting from the top – j p y b f h k l t y
- The diagonal family – v w x z
- The small letters – i m n r s u e
- Introduce letters in groups and add new groups slowly, at a correct pace for the child. Focus on three letters at a time ensuring the child can imitate, copy and write the letter independently from memory before moving on.
- Think of new ways to describe the letters that are visually meaningful to the child.
- Having the child stand upright for vertical writing and lying down on their fronts for horizontal writing allows for more trunk stability, crossing of midline and hand /arm dissociation. (Lying down for only very short periods as not easy to maintain).
- Cursive writing can be important in improving fluency and speed of writing but if a child is already experiencing difficulties in forming letters then learning cursive writing might be an even bigger challenge for them
Reversals
- It is not uncommon for a novice writer to get certain letters the wrong way around, the most common are b and d and p and q
- If an older child is still struggling with a high degree of reversals this could be due to visual perception (ability to analyse and interpret what we see) problems or visual-motor integration skills (ability to transfer what they see into motor movement), if you feel this is a problem speak with an Occupational Therapist
- Having problems identifying left from right can also increase the volume of reversals in work, try encouraging them to use their hands to make a bridge and the left hand shape is the letter L
- They might also have problems with understanding directional language, up, down, around, under, over. Activities can be completed to help with this.
- Get the child to check their work for reversals, are they able to identify and make corrections
- Cursive writing can help to reduce reversals
- Visual reminders can also help, try alphabet strips or pictures
Multi sensory activity ideas for letter formation
- Make raised letters on index cards to use for tracing with the index finger. Here's how to make them: use glue to form the letter, then cover it with sand, glitter, bird seed or puffy fabric paint. Make sure to trace letters and numbers from top to bottom and from left to right.
- Pre-write letters on paper and have the child trace over them with glitter glue.
- Form letters by gluing beans, rice, seeds, etc. on paper.
- Form letters with putty, play dough, clay, etc.
- For letter recognition, have child read through a story at his/her reading level and circle all of the a's or b's, etc.
- Write letters on your child's back and see if he/she can guess what letter it is. Write on each other's palms.
- Cut simple letters out of cardboard or textured material such as sand paper and encourage children to feel or use as stencils
- Have the child draw in a tray of sand/ rice/lentils/shaving foam with finger.
Spacing
- Teach the child to "finger space": place his/her index finger of helper hand after each word they write
- It may be better for some, particularly left hand writers to use coloured pens, straws or a lollypop stick rather than their finger, try getting the child to decorate their own finger spacer.
- Fun spacers can also be found online and laminated.
- Have the child place a dot with a stamp marker or highlighter after each word as a spacer, or to make a small dot with the pencil; they can erase the dots later.
- Initially encourage exaggerated spaces, especially for young writers. Using 2 fingers per space may be a good way to start.
- Teach student to review their own work to determine if there are spaces between the words. If they don't have spaces, they can use a highlighter to add them.
- Some students respond better to concrete instruction such as, "Move your pencil over before you start the next word."
- Highlight right margin if student crams words on right side of paper rather than dropping down to next line.
Pressure
Excessive pressure can increase the level of discomfort when writing. Excessive pressure can be a sign of joint instability in the shoulder or hands or poor proprioception. Providing additional opportunities to build their upper limb strength, Fine motor skills and proprioception can reduce the pressure when writing.
Too little can be a sign of reduced strength and fine motor coordination. Providing additional opportunities to develop all aspects of their fine motor skills and proprioception can help to improve this.
To support the child to be more aware of the pressure they use when writing you can try;
- Using carbon paper get the child to either only go through one copy or go through to the back to encourage the right amount of pressure. Instruct the child to use hard and soft strokes and discuss the difference.
- Experiment with different types of lead strength in pencils or pens with different nib styles. Some styles of nib’s like roller-ball and ball point pens help to promote fluid pen movement across the page
- Use a light up pen that lights when increased pressure is used
- Mechanical pencils can be used to raise awareness of increased pressure
- Using writing slope can support to reduce pressure
Letter placement
Children at times may find it difficult to get the letter sizing correct when writing and this can make the child’s work look untidy, ensure that the child is able to form their letters correctly before completing these activities. Highlighters can provide strong visual cues about letter sizing and help the child monitor their own progress. Standard highlighter pens are about a good width for the size of the small letters.
- Encourage the child to form small letters (a,c,e,i,m,n,o,r,s,u,v,w,x,z) within the highlighted area, starting the small letters at the top of the colour. Once the child has mastered this consistently, you can introduce the tall letters.
- Tall letters (b,f,h,k,l,t) start at the top of the line coming and body formed within the highlighted lines
- If the child has difficulty with this, then introduce a second colour to show where the tall letters should be.
- Once this has been mastered introduce the descender letters with tails (g,j,p,q,y). A third coloured highlighter can be used if needed.
Top Tips
- When letters float above or drop below the line it is often because the child does not place their pencil at the correct spot to start the letter.
- Darken the lines to increase awareness; sometimes copying paper on the darkest setting will make the lines easier to see.
- Experiment with different lined paper
- Some children can find it challenging to form letters correctly because they become confused on the start point. Help the child to separate the letters of the alphabet by start point on the line.
- Raised lined paper can be used to encourage writing on the line by encouraging the child to ‘bump’ their letters off the line
- An alphabet strip attached to the child’s desk to prompt can help. These can be downloaded online or the child could make their own.
- Try, on lined paper, in the left margin draw a simple house: the roof (a triangle) is within the top half of the line, the house is a square within the bottom half, below the house is the basement. Remind the child to start letters in the attic or roof for capitals, tall lower case letters and numbers. Small letters stay in the house and start at the top of the box. Descending letters also start at the top of the box and live in the basement.
Alternatives to Handwriting
Handwriting is a tool for expressing, communicating and recording ideas but if a child’s handwriting does not reflect their academic abilities and becomes a barrier to overcome then it is a good idea to explore alternatives. Using alternative methods does not mean failure it just provides an alternative flexible approach to communicating ideas.
Learning to type is an important skill for all children to learn but can be particularly beneficial for children with motor co-ordination difficulties. Typing requires less input than handwriting and therefore can make writing tasks easier for some children. Typing should not replace handwriting skills as this is still important for the child, but where there are large pieces of written work required, a child may benefit from using a keyboard to type their work to ensure that their work represents their ability.
There are lots of free websites which offer programs to teach children to learn how to touch type. This breaks down the skill into different levels and allows the child to practice their typing skills.
Other alternatives are using Dictaphones or voice recording software to record work verbally, using Mind Maps to structure work into small chunks, multiple choice questions with tick box answers, photocopied notes rather than copying from the board.
Allow the child to present their work in different formats – electronically, oral presentations